


Setting up HTTPS can be a bit intimidating for the inexperienced user — it takes many steps, it requires specific knowledge of encryption and server configuration, and it sounds complicated in general.
Most of the solutions require you to have a custom domain or use tunnelling services like ngrok. But what if you don't have a domain name or don't want to rely on services like ngrok?
In this article I'll show you how to configure an HTTPS server on an AWS EC2 instance without a custom domain. We'll be using Caddy as a reverse proxy and nip.io as our DNS, both of which are dead simple to setup.
Setting up the server
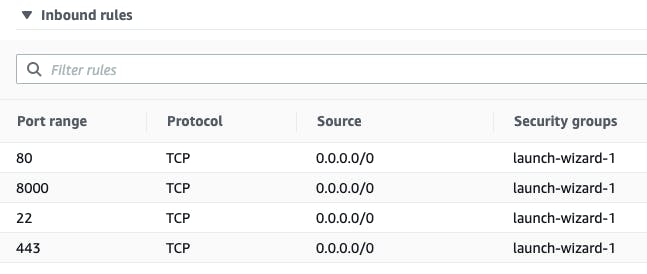
Let's start by creating an EC2 instance with the following Security Group Inbound rules.
Next SSH into the Instance and create an index.html file.

Here, I'm using Python built-in SimpleHTTPServer to quickly start a server and serve index.html

We can see that by going to our <EC2 Public IP>:8000 we can access our webpage.
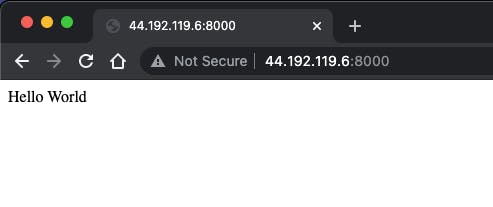
But as you can see the browser complains that the connection is not secure. Let's fix this and enable SSL on this server.
HTTPS using Public IP
Start another terminal session and login into your instance.
Now, install Caddy on the server. Instructions can be found here. Caddy 2 is a powerful open source web server with automatic HTTPS. Caddy simplifies your infrastructure and takes care of TLS certificate renewals.
yum install yum-plugin-copr
yum copr enable @caddy/caddy
yum install caddy
Next we'll create a Caddyfile with the following contents
<EC2 Public IP>.nip.io {
    reverse_proxy localhost:8000
}
Over here, we are using nip.io as a DNS. nip.io allows you to map any IP Address to a hostname without the need to edit a hosts file or create rules in DNS management. nip.io maps .nip.io in "dot", "dash" or "hexadecimal" notation to the corresponding .
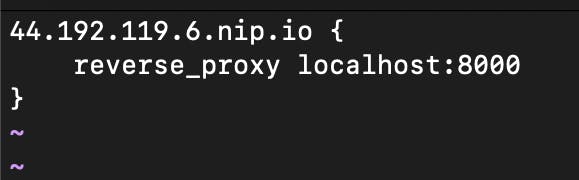
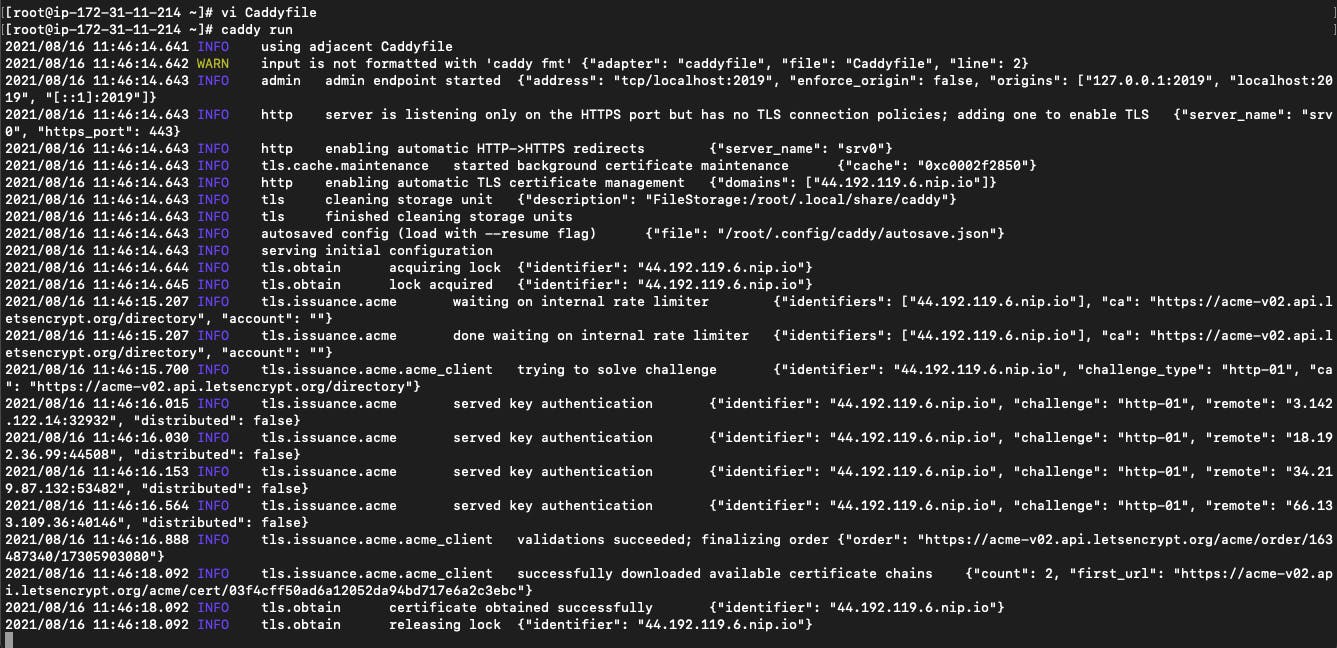
What we are doing here is basically setting up a proxy to forward all requests to port 8000 of our instance. Save the file as Caddyfile and run the command caddy run.
This will start Caddy certificate management service and download a certificate for the indentifier <IP>.nip.io.
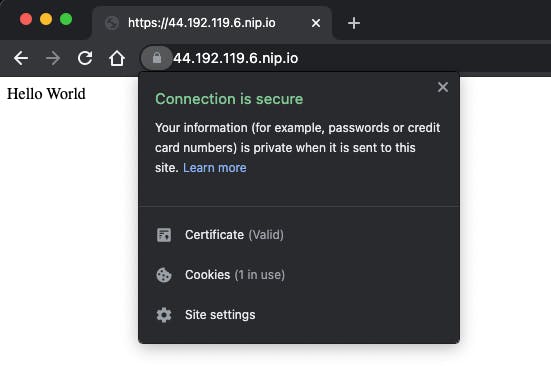
Now if you go to your address <IP>.nip.io you'll see that the connection is secure and the browser no longer complains about insecure connections.
If you want to run Caddy in background all you have to do is run caddy start.

Using a combination of Caddy and nip.io you can easily setup HTTPS certificate on basically any server without a custom domain or much experience with handling certificate chains.
👋 Hope this was helpful!
Feel free to reach out to me on Twitter.